AdBlue Emulator V4 EVO installation manual for Volvo FH4/FM4 EURO 5 trucks
AdBlue Emulator V4 EVO FH4 EURO 5 is compatible only with Volvo FH4/FM4 EURO 5 trucks. This installation manual describes the whole process of AdBlue Emulator device installation on compatible Volvo FH4/FM4 EURO 5 vehicles. We highly recommend you to delete all DTC (Diagnostic Trouble Codes) errors from OBD (On-Board Diagnostics) system on your truck. The best option is to use the original Volvo diagnostic scanner. Also, it is recommended to check the OBD system after installation of AdBlue Emulator module because there might be errors related to installation procedures.
Vehicle preparation! To make sure that the emulator works as intended, you would need to launch active DPF regeneration before installing the emulator. To do that, you need to connect the vehicle to a diagnostics system (original Volvo or TEXA) and activate the regeneration function.
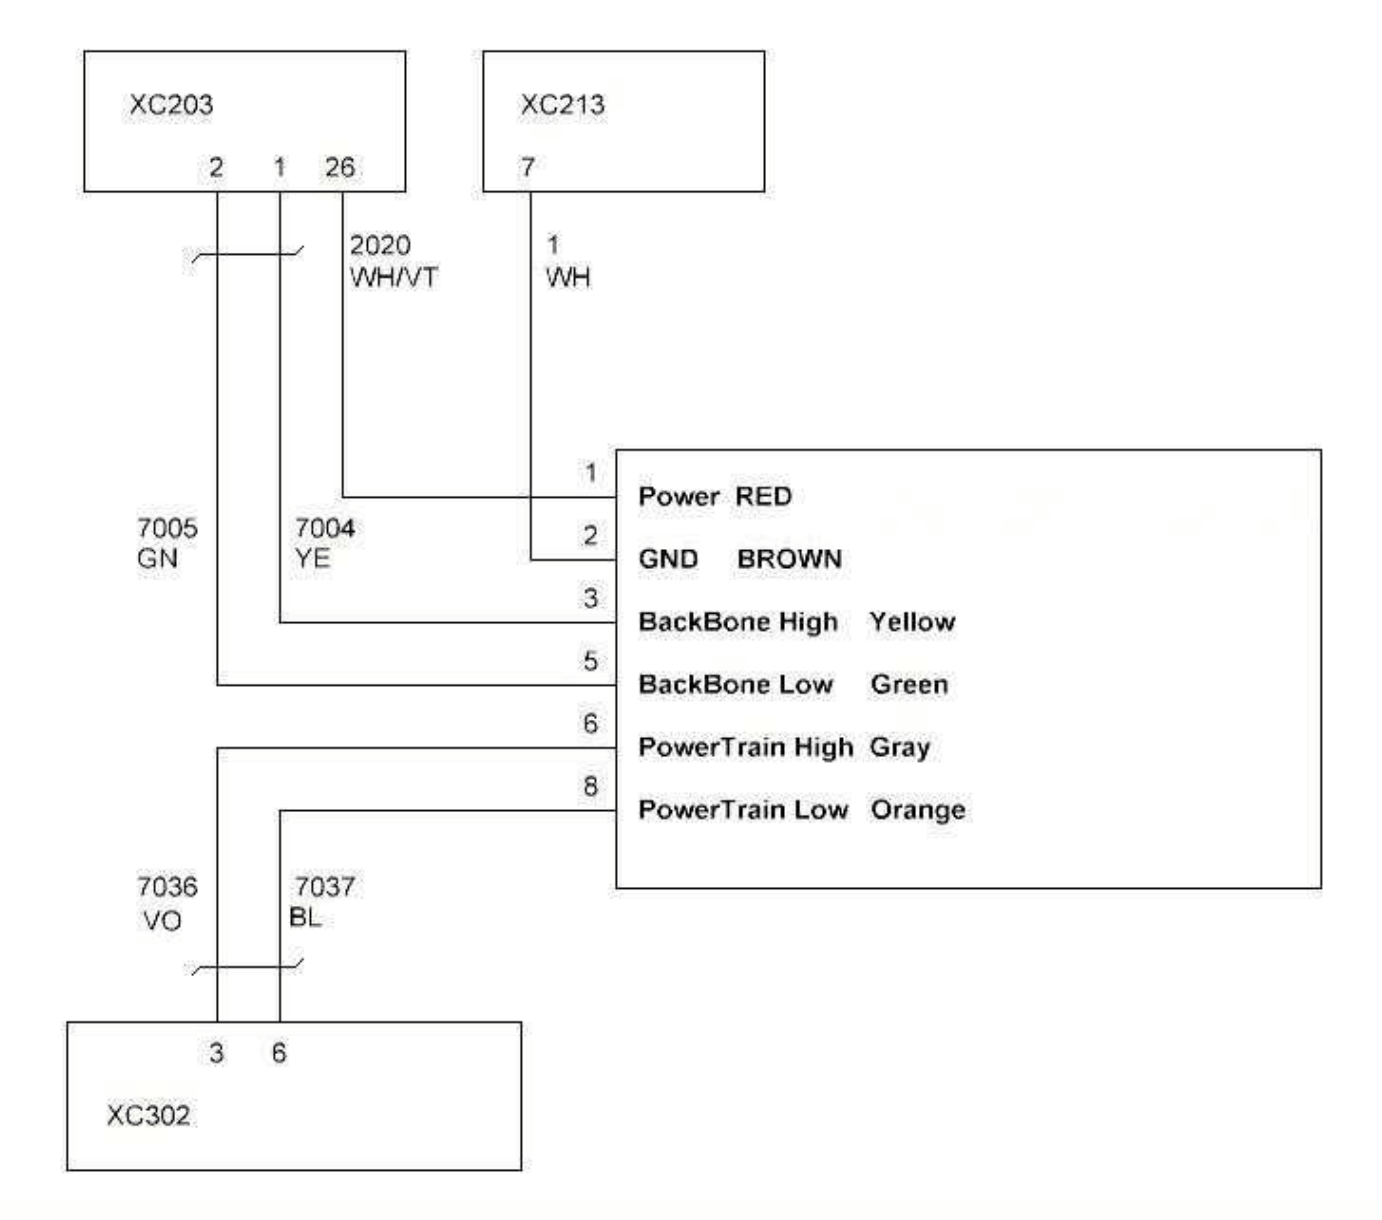
Connection diagram. Attention! Pay attention to the emulator sticker; colors of wires may vary.
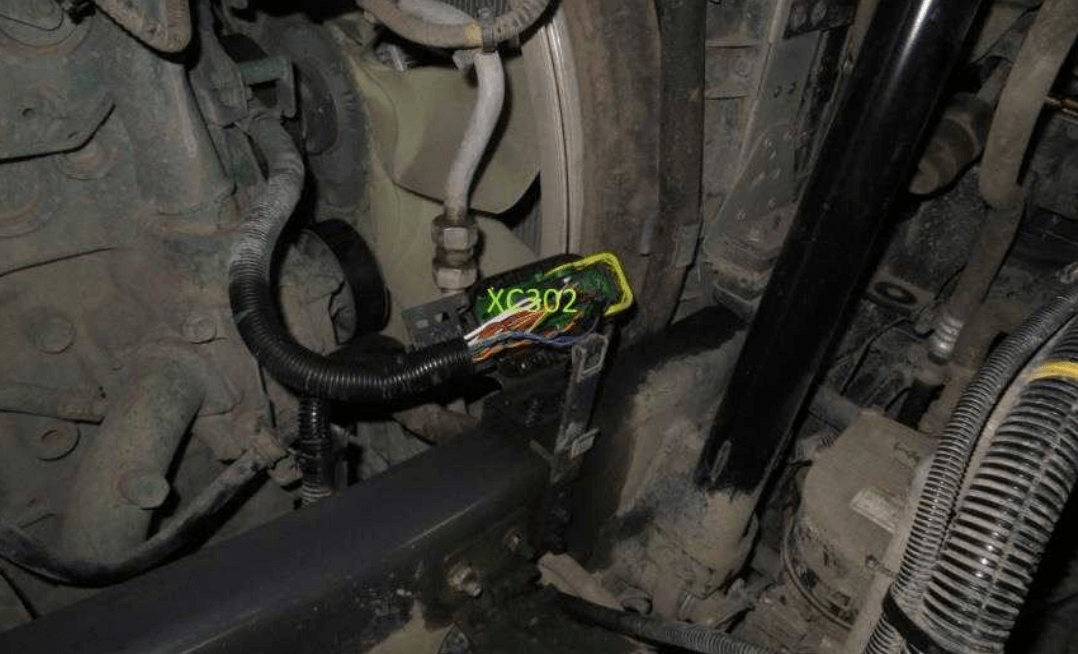
Connector location
Step 1: XC203 wire connections
Turn off the ignition.
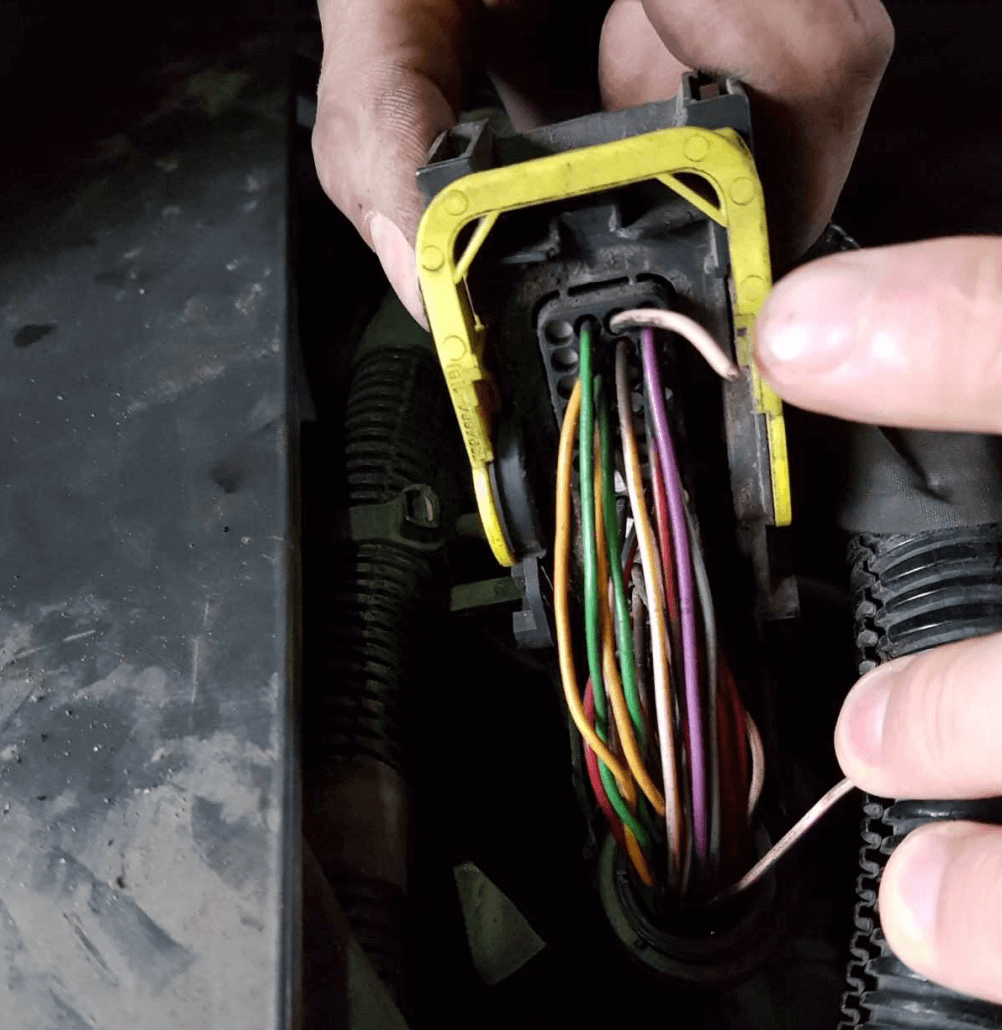
Find the XC203 connector (refer to the images above)
Connect the following wires: Yellow (emulator CAN1 High) to wire 7004 (truck XC203, pin 1), Green (emulator CAN1 Low) to wire 7005 (truck XC203, pin 2), Red (emulator positive) to wire 2020 (truck XC203, pin 26)
Step 2: XC213 wire connections
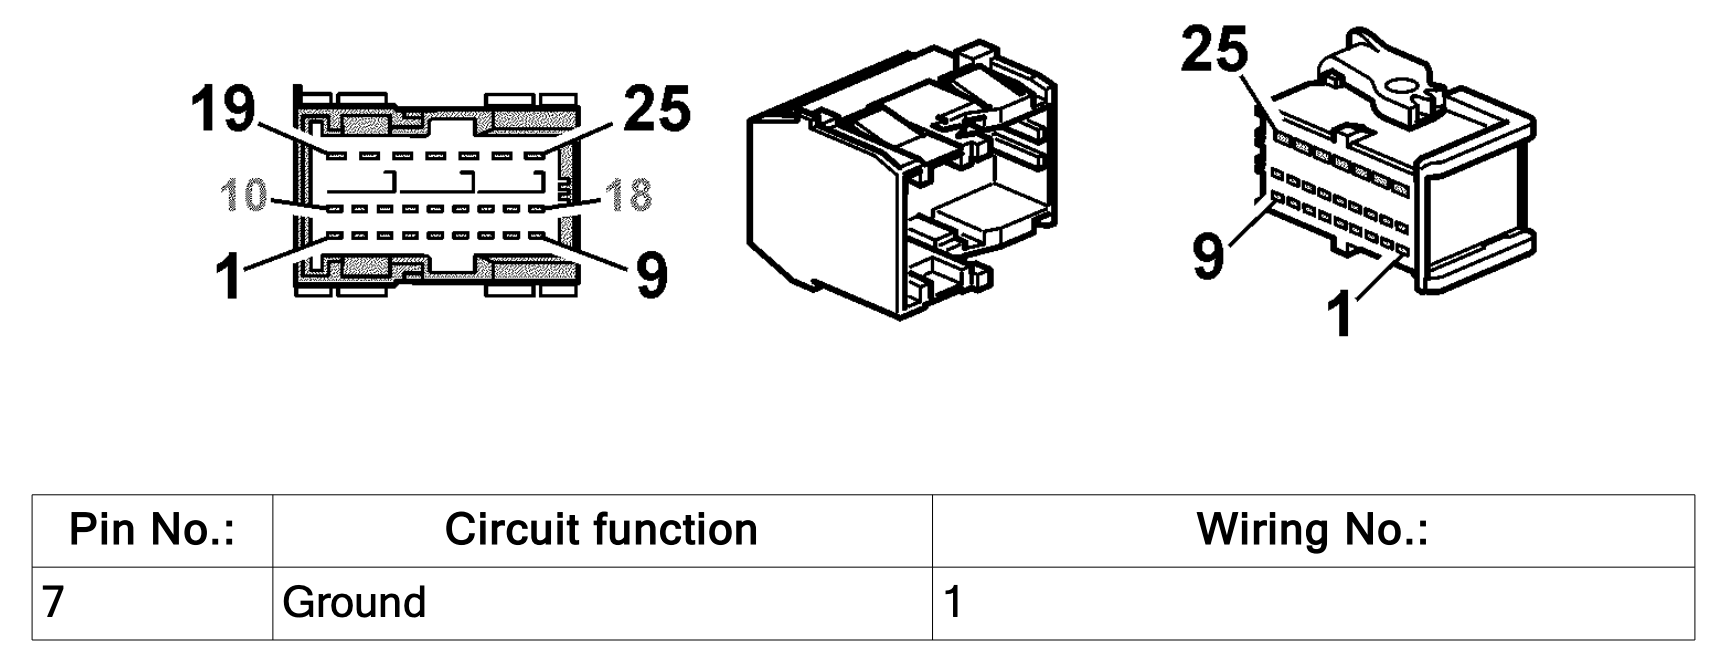
Find the XC213 connector (refer to the images on the previous page)
Connect the following wires: Brown (emulator ground) to wire 1 (truck XC213, pin 7)
Step 3: XC302 wire connections
Find the XC302 connector (refer to the images on the previous page)
Connect the following wires: Gray (emulator CAN2 High) to wire 7036 (truck XC302, pin 3), Orange (emulator CAN2 Low) to wire 7037 (truck XC302, pin 6)
Step 4: Disabling NOx and ACM modules
Find the A174 connector on the ACM module
Find the CCIOM module
Location of the CCIOM and ACM modules:
Disabling the ACM
Cut the wire on pin 3 of the A174 connector
Isolate the wire from both sides and plug the connector back in place
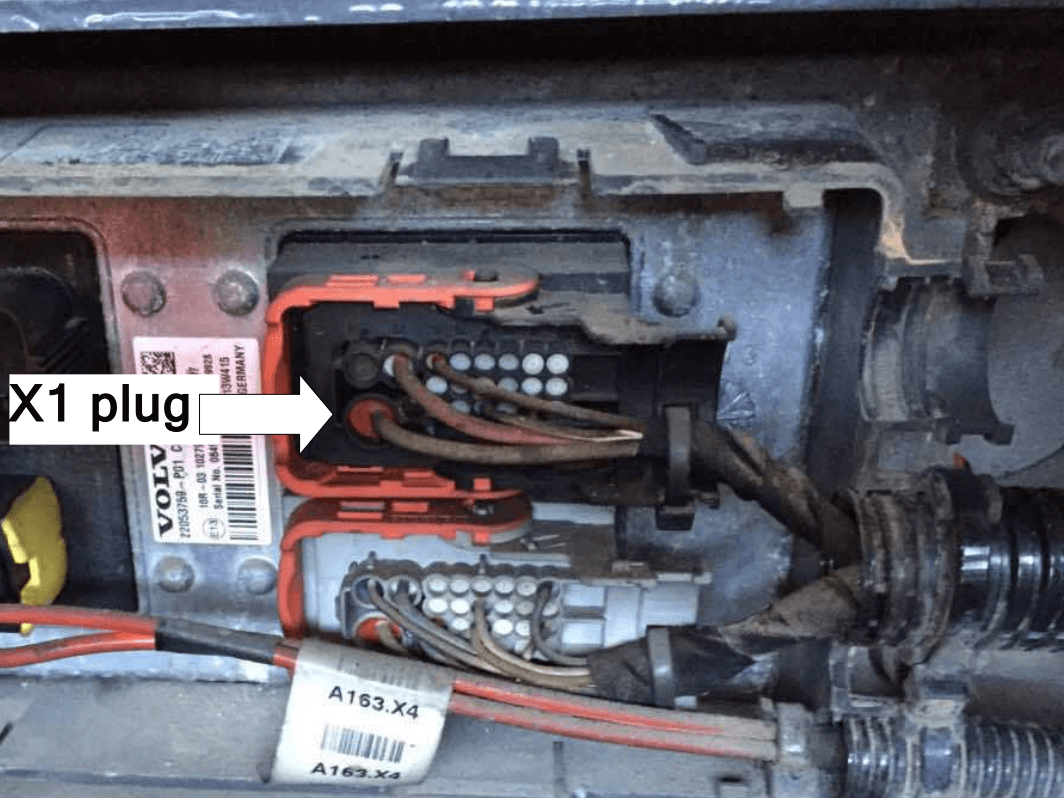
Disabling the NOx
Find the X1 plug.
Cut the wire on the 6th pin on the X1 plug.
Diagram for disabling ACM and NOx
Cut the 2020 wire on pin 3 (marked with the red X on the diagram below).
MAKE SURE TO ISOLATE THE WIRES!
WHITE – POWER
BROWN – GROUND
GREY – CAN1 (HIGH)
BLUE – CAN1 (LOW)
YELLOW – CAN2 (HIGH)
GREEN – CAN2 (LOW)
To enable retarder support set switches 1-ON, 2-OFF, to disable retarder support set both switches to OFF position.
AdBlue Emulator V4 EVO for Volvo FH4 EURO 5 product
US$ 173–US$ 463Price range: US$ 173 through US$ 463
Select options
This product has multiple variants. The options may be chosen on the product page
Attention! AdBlue emulators are illegal in some countries. You should check your local laws or laws of those countries that you might cross with your vehicle. AdBlue emulator alters SCR system thus makes the vehicle to produce higher exhaust gas emissions. EURO 6 and EURO 5 vehicles equipped with AdBlue emulator device will no longer match those EURO standards. Our AdBlue emulators designed for countries where environmental rules are less strict, and there are no requirements for vehicles to satisfy EURO 6 or EURO 5 regulations. By purchasing any AdBlue emulator, you assume full responsibility for the use of the device. It’s your personal decision to use an emulator or not. We will not accept any liability for any consequences associated with usage of AdBlue emulator devices.


")